Legs & glutes · Hip extension
Glute bridge
Check the setup, practice a controlled repetition, then use your program’s sets, reps and rest.
Return to My Training →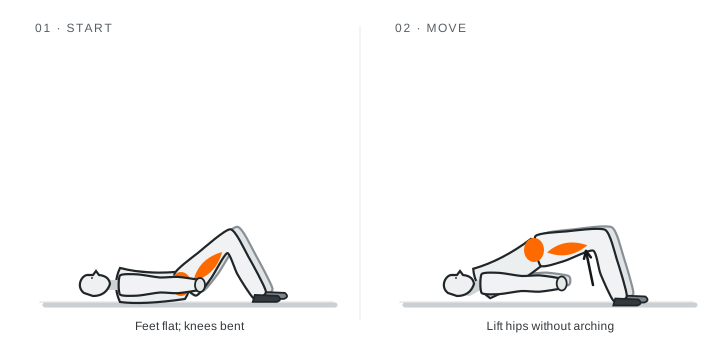
- Equipment
- Mat
- Muscles worked
- Glutes, hamstrings
- Movement
- Hip extension
How to perform
- Lie on your back with knees bent and feet flat.
- Gently brace and squeeze glutes to lift hips.
- Stop before your low back arches.
- Lower slowly.
- Keep your neck relaxed.
Three cues to remember
- Push through the whole foot.
- Lift with glutes, not your lower back.
- Keep your neck relaxed.
Common mistakes
- Arching the low back.
- Pushing through toes.
- Holding the breath.
Slow the movement and reduce load or range if your position changes. Stop for pain rather than forcing the repetition.
Make it easier
Use a smaller comfortable lift.
Progress when ready
Add a brief pause, then a light padded weight across the hips.
Practice with a light load. Diagrams show general positions, not an assessment of your form. Use the written setup and equipment instructions; get qualified coaching for unfamiliar lifts.
Find it in your program
Exercise guides explain the movement. Your training program sets the workload; an alternative replaces a movement rather than adding another one.
Instructional references
Original Physiforge instructions and diagrams use established movement principles. General references are not endorsements or individualized coaching.
NASM: floor bridge ↗