Legs & glutes · Hip extension
Hip thrust
Check the setup, practice a controlled repetition, then use your program’s sets, reps and rest.
Return to My Training →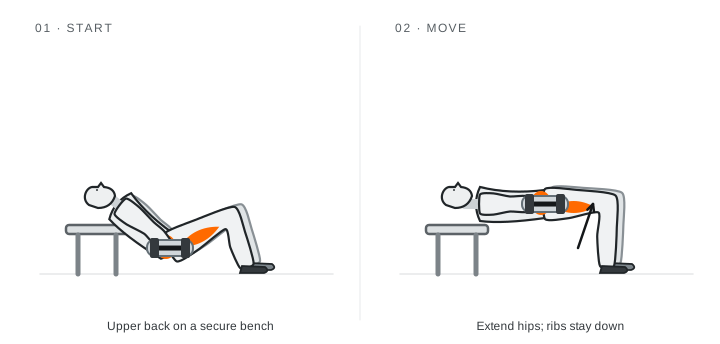
- Equipment
- Stable bench and padded dumbbell or barbell
- Muscles worked
- Glutes, hamstrings
- Movement
- Hip extension
How to perform
- Support the upper back on a stable bench.
- Keep the load padded and secure over the hips.
- Brace and lift until hips are extended without arching the lower back.
- Lower with control.
- Use a glute bridge if the setup is not secure.
Three cues to remember
- Secure the bench first.
- Pad and control the load.
- Finish without arching your back.
Common mistakes
- Sliding bench.
- Unpadded load.
- Finishing by arching the back.
Slow the movement and reduce load or range if your position changes. Stop for pain rather than forcing the repetition.
Make it easier
Floor glute bridge.
Progress when ready
Add repetitions, then load while keeping the setup stable.
Practice with a light load. Diagrams show general positions, not an assessment of your form. Use the written setup and equipment instructions; get qualified coaching for unfamiliar lifts.
Find it in your program
Exercise guides explain the movement. Your training program sets the workload; an alternative replaces a movement rather than adding another one.
Instructional references
Original Physiforge instructions and diagrams use established movement principles. General references are not endorsements or individualized coaching.
ACE exercise library ↗