Chest & triceps · Horizontal push
Floor push-up
Check the setup, practice a controlled repetition, then use your program’s sets, reps and rest.
Return to My Training →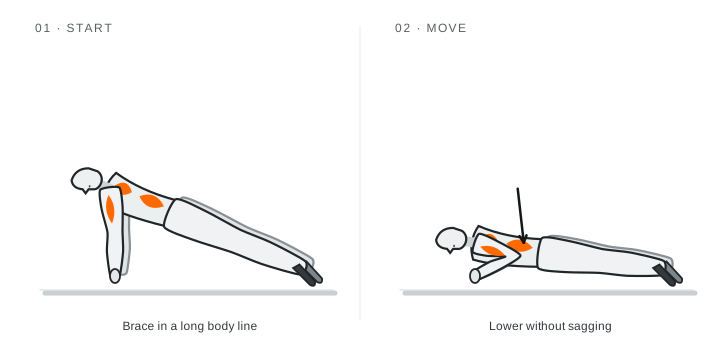
- Equipment
- Floor or mat
- Muscles worked
- Chest, triceps, shoulders, trunk
- Movement
- Horizontal push
How to perform
- Set hands just wider than shoulders and brace your trunk.
- Lower chest and hips together with elbows angled comfortably back.
- Press the floor away while keeping your body in one line.
Three cues to remember
- Brace before lowering.
- Keep your body in one line.
- Use an incline when form changes.
Common mistakes
- Hips reaching the floor first.
- Jutting the chin.
- Cutting the range to gain reps.
Slow the movement and reduce load or range if your position changes. Stop for pain rather than forcing the repetition.
Make it easier
Incline push-up.
Progress when ready
Add controlled repetitions, then a pause before adding resistance.
Practice with a light load. Diagrams show general positions, not an assessment of your form. Use the written setup and equipment instructions; get qualified coaching for unfamiliar lifts.
Find it in your program
Exercise guides explain the movement. Your training program sets the workload; an alternative replaces a movement rather than adding another one.
Instructional references
Original Physiforge instructions and diagrams use established movement principles. General references are not endorsements or individualized coaching.
ACE: chest press reference ↗